When you’re new to 3D modeling, the design process can seem both exciting and a bit daunting. However, a few fundamentals can help you quickly climb the learning curve—and ensure your models print smoothly. In this blog post, we’ll cover essential do’s and don’ts for creating printable 3D designs, plus recommend some beginner-friendly software options.
1. Sketch and Plan First
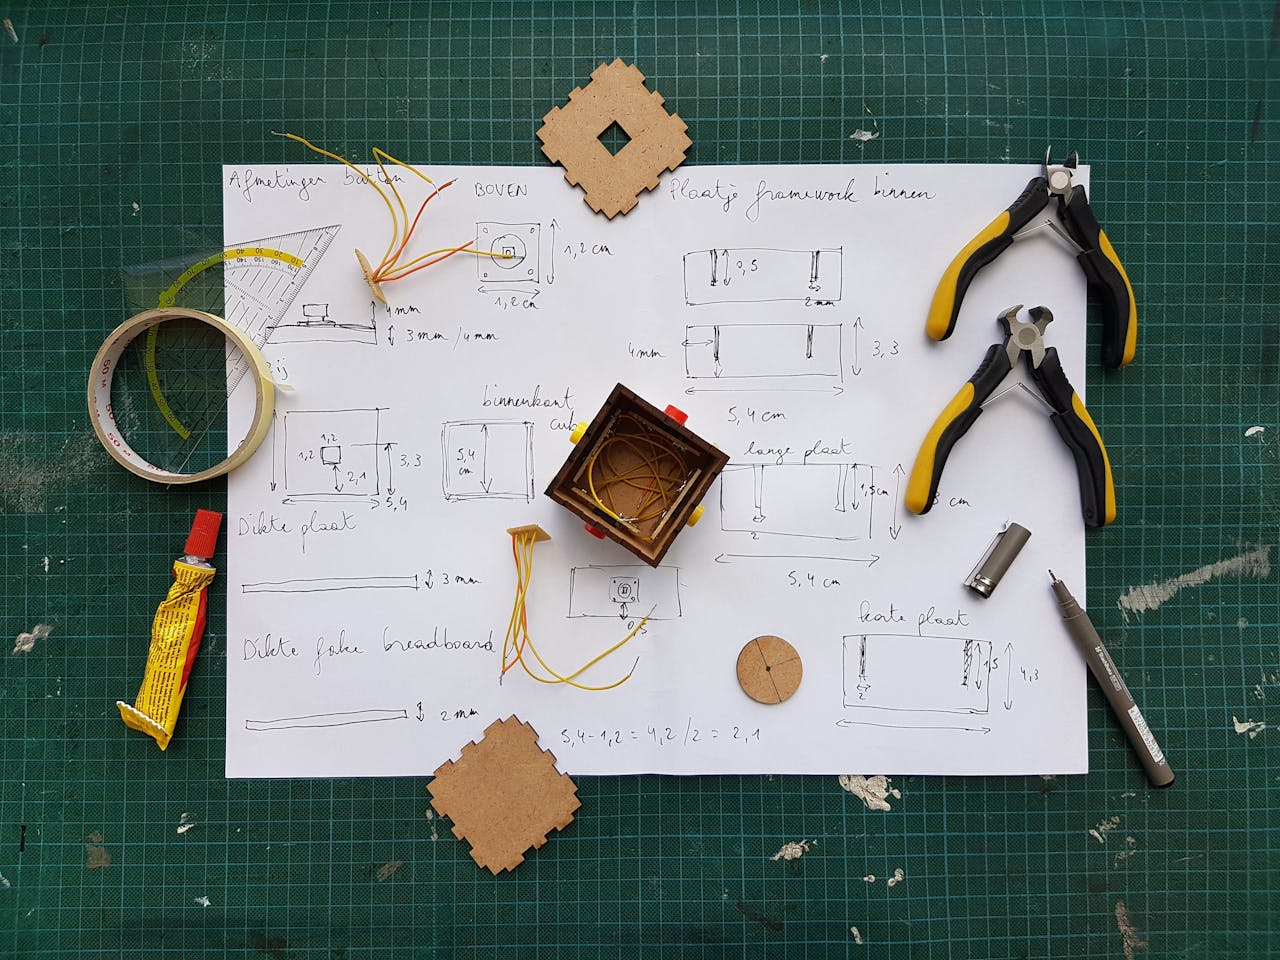
Before diving into CAD software, outline your idea on paper or in a digital sketching tool:
- Do: Clarify the size, shape, and function of your design.
- Don’t: Jump straight into complex modeling without a plan—it often leads to messy geometry or missed features.
Pro Tip: Having a simple 2D reference sketch helps you maintain a clear direction throughout the modeling process.
2. Choose the Right Software
Not all CAD tools are created equal—some have advanced features for mechanical design, while others cater to artists or hobbyists.
- Fusion 360: A great all-around choice, blending engineering-level precision with an intuitive interface. Perfect for product design, mechanical parts, and prototyping.
- SolidWorks: An industry standard for mechanical and engineering projects, especially if you need detailed simulations and advanced assemblies.
- Blender: Primarily known for animation and art, but also very capable of producing 3D printable models with organic shapes and sculpted details.
If you’re just starting out, you might also try Tinkercad (a free, browser-based app) to learn the basics of 3D modeling without a steep learning curve.
3. Master the Basics of CAD Geometry
Most CAD workflows revolve around creating and modifying simple shapes to form complex objects.
- Do:
- Use Constraints: Lock down lines, angles, and dimensions so your design remains accurate.
- Fillet or Chamfer Edges: Rounded or beveled edges can improve strength and reduce stress points in 3D prints.
- Check Wall Thickness: Ensure walls aren’t too thin; this avoids structural weakness or print failures.
- Don’t:
- Neglect Overhangs: If your design has large overhanging sections, they may require supports during printing.
- Overcomplicate Early Stages: Keep your base geometry simple until you confirm overall proportions—then add small details.
4. Keep 3D Printing Constraints in Mind
A design that looks great on screen might still be challenging to print if it doesn’t adhere to basic 3D printing principles.
- Do:
- Consider Layer Lines: Thin, protruding features oriented horizontally might lose definition or fail to print.
- Account for Tolerances: If your parts need to fit together, include a small gap (e.g., 0.2 mm) to allow movement or proper assembly.
- Don’t:
- Ignore Material and Printer Limits: Every printer and filament has recommended settings for layer height, print speed, and temperature. Large prints may need brims or rafts for stability.
- Overlook Bed Adhesion: Designs with a small footprint can topple during printing unless you adjust support or add stability features.
5. Double-Check Your File
Before you send your file off to the printer, verify that it’s ready.
- Run a Mesh Check: Many CAD programs have tools to detect non-manifold edges, flipped faces, or holes in the mesh.
- Export in the Right Format: Most 3D printers accept .STL, .OBJ, or .3MF. Make sure your export settings have sufficient resolution to capture small details.
- Scale & Orientation: Ensure your model is at the correct size and rotated in a way that minimizes supports or improves surface quality.
6. Need Help? We’ve Got You Covered
If you’re short on time or unsure about a design’s print readiness, Hudson 3D Labs can assist. Our team offers:
- CAD Modeling Support: We’ll translate your sketches or concepts into high-quality 3D models, optimized for printing.
- Design Consultations: Unsure about wall thickness or overhang angles? We provide guidance for best print success.
- Printing Services: We can handle the entire process—from slicing to post-processing—so you receive a polished, functional product.
Final Thoughts
Embracing 3D modeling as a beginner is all about patience, practice, and clarity. Start with simple projects, gradually build your skills in CAD, and always keep your printer’s capabilities in mind. With the right approach, you’ll be able to bring everything from household gadgets to ambitious product prototypes to life—one layer at a time.
Have questions or ready to kick off your next 3D design project? Reach out to Hudson 3D Labs and let us help you turn your ideas into high-quality, 3D-printed reality.